- Make sure that you have removed the installation floppy and reset the computer.
- Double-click on !PCConfig.

- The program will load on to the icon bar.
- Click Select on the PCConfig icon on the icon bar.
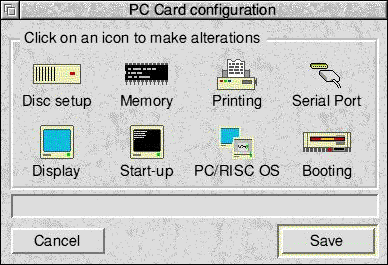
- The following setup window will appear:
- Click on each icon in turn, entering your choices in each dialogue box. You must enter details in the Disc setup section, and you should check that the settings in Memory, Printing and Display are suitable for your system: other options are a matter of personal preference.
- When you have finished configuring each option, click the Save button in the PC Card configuration window to save your choices.

Note that the window has different options for different PC Cards, and future versions of the software may also look different from the examples here.