Previous page Contents Next page
Troubleshooting

Appendix A Configuration


A.1 Advanced configuration options

!PCconfig includes a wide range of options for customising your PC setup. In most cases you will not need to change these, but you may have specific requirements or a set of hardware which makes this necessary.


A.2 Enabling advanced configuration options

Should you want to add any of these options to the !PCConfig advanced configuration window, you will need to edit the ConfData text file inside the !PCConfig application. 

To do this:

  1. Shift double-click on the !PCconfig application icon in the filer window.
  2. Open the ConfData file using a text editor such as !Edit.
  3. You will see that it contains a list of options and settings. Options are prevented from appearing in the !PCConfig window by a # character at the start of the title string.
  4. Removing the # from an option will enable the option for configuration with !PCConfig.
  5. When you have enabled or disabled the required settings, save the updated file.
  6. Next time you load !PCconfig the revised set of options will appear in the Advanced configuration window. Change the settings you want, and click the OK button to confirm and save your changes.
 

A.3 Editing advanced configuration options

To update your configuration options:
  1. Load the !PCConfig program.
  2. Choose Advanced configuration from the Open menu.
  3. A warning box will appear, telling you not to change options without instructions from the Readme file. Click OK.
  4. The advanced configuration window will be displayed and you can open any section to update or change your choices:

  5.  

  6. Remember to click Save when you have finished editing your choices, and to quit and reload !PC so that your changes come into effect.
  7.  
 

Adding options to the advanced configuration window

Not all the available options are displayed automatically in the Advanced configuration window.

However, all are stored in !PC Config’s ConfData file. 

To add hidden options to the advanced configuration window:

  1. Shift double-click on !PCConfig to open its directory.
  2. Load the text file ConfData into a text editor.
  3. Each item is listed in the file. Hidden items have a # character in from of their item name.
  4. Delete the # character from the options you want to appear.
  5. Save the edited file.
  6. Reload !PC Config.
The hidden options will now appear in the file.

You can also edit the configuration directly by opening the file Config inside !PC.

A.4 Advanced configuration options

The entries in this section have the title of the option as it appears in the !PCconfig window. 
 

Enable VGA mode support

Config line:VGA Attached On|Off
Default setting:on
 
  • All RISC PCs support VGA resolutions so this option does not appear for second processor cards.
Expansion card users should select Enable VGA mode support if their monitor is capable of displaying a VGA screen. 

If you do not have a monitor capable of displaying VGA modes (Monitortype 1,3 or 4 required) then the PC Card will revert to multitasking mode if a VGA or EGA mode is selected. 

If you want to operate in single-tasking mode you should turn this option off, which will mean that CGA modes are always used and the PC Card will be able to remain in single-tasking mode. The VGA display requires an extra 512K of RAM to operate: check that you have enough free RAM under RISC OS before making this configuration. 

Video retrace emulation


Config line: RetraceEmulation 0|1|2
Default setting: Normal (0)

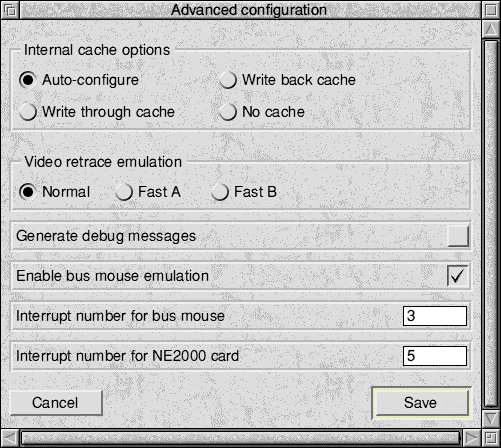
The three options here are Normal, Fast A, and Fast B. Normal is the default. 

This option controls how the PC Card software emulates the Vertical and Horizontal Retrace registers found on VGA cards. These registers are used by very old software to avoid rewriting screen memory whilst it is being displayed (which caused snow on XT-vintage display systems). They are also used by games for things like synchronisation and generating pseudo-random numbers. For a perfect emulation the PC Card would have to spend its entire time updating these registers, so a compromise in necessary. Three possible options are given. 

If you have trouble with very old software that uses CGA or EGA modes and displays extremely slowly, then try changing this setting. Also if you get division by 0 errors or other failures with games it is worth trying changing this setting to see if it helps. 0 is most compatible, while 1 and 2 may make DOS software run faster. 
 

Allow desktop operation

Config line: UseWindowFE On|Off 
Default setting: on 

Select Allow desktop operation if you want to be able to run the PC in multi-tasking mode on the RISCOS desktop or if you want to use the Windows driver. The default setting is On. 
Turning it off disables the multitasking option where the PC card runs in a window on the RISCOS desktop. It saves a few K of memory. The only reason for turning it off is if you are very short of memory under RISC OS and only want to run DOS software. 
 

Shrink PC window to fit screen

Config line: ScaleToFit On|Off

Default setting: off

Select Shrink PC window to fit screen if you want to scale the PC screen to fit your screen..
 

  • This option causes the window front-end to attempt to keep the RISC OS window the same size regardless of PC display mode or RISC OS mode. The best way to understand this effect is to try it in several PC and several RISC OS modes. 

Maths Coprocessor present

Config line: Coprocessor on|off

Default setting: on

This option is auto-detecting. You may explicitly set this to Off to over-ride the auto-detection.
 

Use low-resolution font for text modes

Config line: UseLoResText On|Off

Default setting: off 

If your monitor is not VGA or better, you may prefer to use Low-resolution text which is designed to be easier to read on low-resolution screens. If you are using a multi-frequency monitor you should not select this option. 

Use MDA (monochrome) video mode

Config line: InitInMono On|Off

Default setting: off 

Select this option if you need to work in monochrome (MDA) mode on the PC. You will only need this option for extremely old software that cannot run in colour. This option may be discontinued in the future.

Use powersaving features

Config line: PowerSaving On|Off

Default setting: on

This option uses the powersaving features of the 386 and 486 CPUs on all Aleph One PC cards, to make significant heat and power savings when in multitasking mode and when frozen. There is no performance penalty so this option should always be on. 

Generate debug messages

Config line: Trace On|Off

Default setting: off

This line is used to turn on trace information when you have a problem with running software. See the Troubleshooting chapter (section 8 on page 67) for details. 

Level 1 cache

Config line: L1Cache 0|1|2|3

Default setting: autodetecting
L1 cache controls the processor’s internal (Level 1) cache.

Level 1 cache depends on whether the CPU has a write back or a write through cache. It should be set to:
 

  • writeback for Mark I second processor cards.

  •  
  • writethrough for expansion cards
This option should be correctly set when you receive your software and it never needs to be changed, so it does not appear in !PCconfig. You only need to reset this option if you lose or damage your configuration file, or attempt to use this software with an Acorn PC card or a later Aleph One card.
 

Level 2 cache

Config line: L2Cache 0|1|2|3
Default setting: autodetecting

This option is irrelevant to expansion cards.
L2 cache controls the external (Level 2) cache.

The correct settings depend on your hardware.

Level 2 cache should be set to:

  • 1 for Mark I second processor cards.
  • 2 for Mark II second processor cards.
This option should be correctly set when you receive your software and it never needs to be changed, so it does not appear in !PCconfig. You only need to reset this option if you lose or damage your configuration file, or attempt to use this software with an Acorn PC card or a later Aleph One card.

Cache size

Config line: L2Size n

Default setting: 256

This option governs the size of the level 2 cache in second processor cards. It is irrelevant to expansion cards.

The correct setting depends on hardware but can be between 32K and 512K.

TI486SXL2 clock-doubling enabled

Config line: ClkEnabled On|Off

Default setting: depends on hardware

This option, for second processor cards only, must be on if a TI486SXL2 processor is installed.

ASIC features disable

Config line: ASICoptions 0|1|2

Default setting: 0
 

         where 0 normal
          1 disable small write buffer
          2 disable large write buffer
This option, for second processor cards only, can be used to disable ASIC features. Any setting other than normal will slow down your  This option, for second processor cards only, can be used to disable ASIC features. Any setting other than normal will slow down your 

Floppy drive size

Config line: Floppy0|1 360|720|1200|1440 

Default setting: 0 (autodetecting) 

These settings specify the type of floppy drive fitted. Default lets the PC application work it out for itself. This works in all except exceptional configurations. If this does not work then you need to give one of the other values: 

         3.5" double density (720K)  720 
         3.5" high density (1.44M)  1440 
         5.25" double density (360K)  360 
         5.25" high density (1.2M)  1200

Interrupt number for NE2000 card

Config line:  NE2000Int n

Default setting: 5

This option specifies the interrupt that the NE2000 Emulation will use if you are using the network drivers. See the network driver documentation for details, and Network cards on page 60. Usual value is 5.

Enable bus mouse emulation

Config line: Busmouse on|off

Default setting: on

This enables or disables the emulation of the Acorn mouse as a DOS bus mouse. It should be left on unless you wish to use a serial mouse plugged into the PC card, or need to release the interrupt for some other use.
 

Interrupt number for bus mouse

Config line: BusMouseInt nDefault setting: 3

This specifies the interrupt that the bus mouse emulation will use. If you are using the supplied AMOUSE/COM driver (4th Dec 1992), then you must leave this at 3. The MOUSE/COM supplied with Windows can use interrupts 2,3 or 5.
 

Aleph One Ltd. 73-81
 
Previous page Contents Next page