| Qty | Iterm |
| 1 | 2-pin 0.1" female socket (for example, molex) |
| 1 | 10-pin (2x5) female socket |
| 2 | 25cm lengths low-voltage wire (ideally Red & Black) |
| 1 | 47K (or 500K variable) 0.25W resistor |
| 1 | Soldering iron or crimp tool |
- Make up a cable with a socket at each end joined by the two lengths of wire. Connect the resistor in series with the Red wire, ie the signal not the ground.
- Twist the wires together along their length. You should end up with something which looks like this:
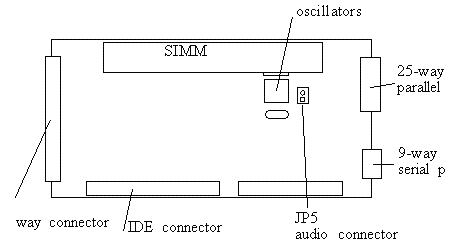
- Fit one end of the cable over the sound plug on the PC card. Attach Black to Ground (furthest from the JP5 label)and Red to Output (closest to the JP5 label). The location of the plug on the PC Card is shown below:
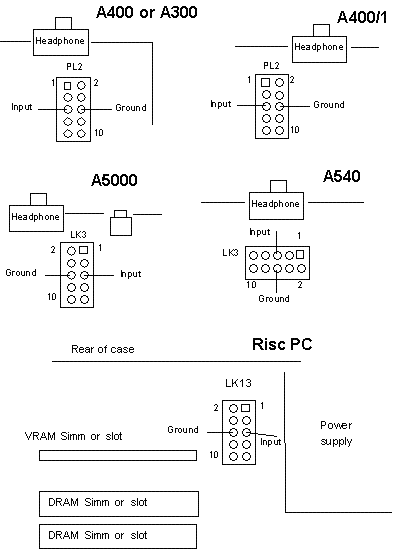
- Fit the other end of the cable onto the host computers Auxiliary Audio Connector. This consists of two rows of five pins located on the main circuit board towards the rear of the computer. The exact arrangement varies according to which kind of computer you have.
- Ensure that the Output of the PC card connects to the Input of the computer via the resistor and that the two Grounds are also connected together.
- Now test your work. You can use the file SNDTST/EXE supplied on the !PC disc (after copying it to a DOS disk or partition), or use a sound generating application under DOS or Windows.